Tiling a room can be intimidating if you haven’t done it before. All of us are under constant time pressure, so we’d like to complete the project as quickly as possible. Ideally, we’d want to get the job done in a day or two, but is it possible to tile large areas in one go without the tiles slipping haphazardly down the walls?
Tiling an entire room is possible if you lay three rows of tiles at a time across the whole length of the room. Repeat the process starting at your initial starting point. The key is to use quality tile spacers, which support the tiles and ensure that they are accurately aligned.
Preventing the tiles from moving for long enough to allow the tile adhesive to dry sufficiently is the key to tiling large areas at a time.
Read on to see how many rows of tiles can be laid at a time while getting the job done neatly and efficiently, but first let’s briefly recap on the general process of tiling (and why tile adhesive is so important).
The Basics Of Tiling
Tiles are found in just about every home in the world and are available in various shapes, sizes, finishes, and materials. Ceramic tiles are the most popular and cost-effective and can be used on walls and floors.
Tiles set the tone of a room and can range from straightforward practical tiles to intricately laid mosaics used to form a picture or design.
The process of actually laying tiles is relatively straightforward:
- Prepare the surface of the wall, making sure it is straight, smooth, and clean
- Plan your tile layout to minimize tile cutting
- Apply tile adhesive to the surface of the wall using a notched trowel
- Press the tile against the adhesive, making sure it’s where you need it to be
- Insert a spacer onto the corner of each tile to align the next
- Repeat until the wall is covered
- Once the adhesive is dry, grout the gaps between the tiles
- Wipe off the excess grout, and you’re all done.
The process described above is very simplified, and there is, of course, a bit of planning that needs to be done to make sure you buy the suitable materials for the job.
Deciding what design style and look you’re aiming to achieve for the room will determine what type of tiles you choose for the job. Glazed porcelain, followed by ceramic tiles, is the most popular tile type used in wet areas like bathrooms and laundry areas.
Porous tiles are best for use in dry areas like passages or kitchens. They are usually less slippery than porcelain tiles but require regular sealing to ensure they stay looking good.
The Importance of Tile Adhesive
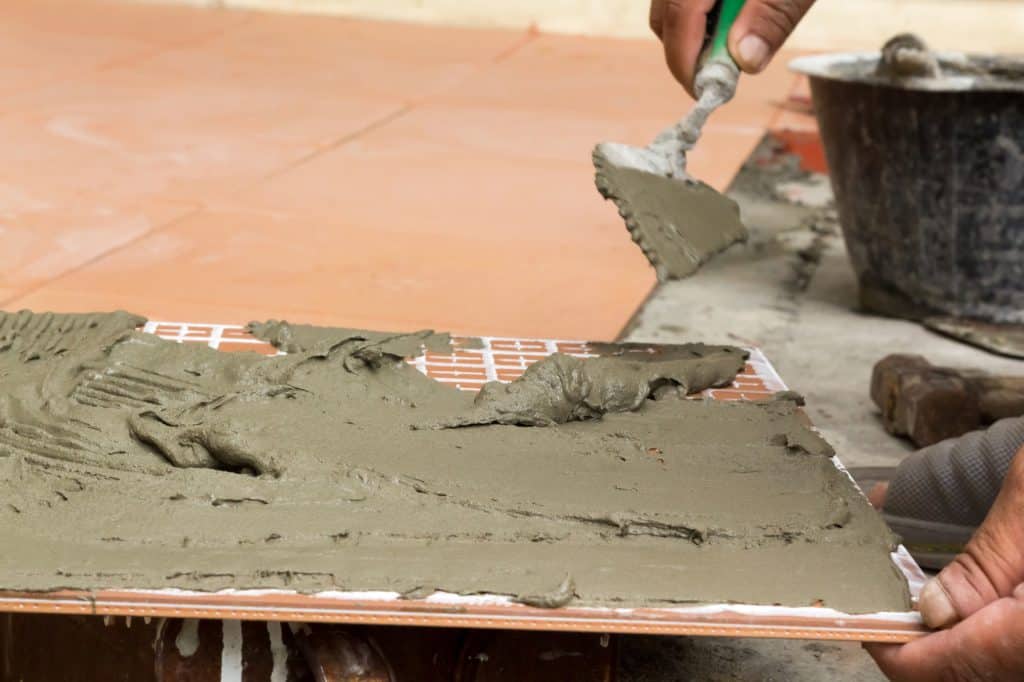
Tiles are attached to the wall by a tile adhesive. The type of tile you’re going to use and the wall you’re tiling onto will dictate the type of tile adhesive required. Thinset mortar is the most popular option and is well suited for use with most tiles. Mastic, also known as ceramic tile adhesive, is a close second in popularity.
Most DIY wall tiling projects are done in bathrooms or kitchens. Plastered walls are an excellent surface to tile because they are smooth and solid. Bathroom walls are often boarded with materials like mold-resistant sheetrock or in the shower with cement backer board.
Thinset mortar or adhesive is perfect for tiling drywall or cement backer board. A note, though, drywalling is not suitable for showers as moisture will weaken the board should it get wet.
Other types of tile adhesive are latex which is mixed into the powdered Thinset mixture to enhance its waterproofing qualities and strength. Acrylic tile adhesive is excellent in semi-wet areas such as bath surrounds. Epoxy adhesives are generally used for specialty tiling projects and require a skilled tiller to get the job done correctly. Swimming pool tiles are attached with epoxy adhesive, so it’s strong!
Thinset mortar is available in a powdered form and needs to be mixed with water to form a paste of the right consistency. Thinset is also available in a pre-mixed bucket which is very convenient.
Mastic or ceramic tile adhesive is made to a thinner consistency and is well suited to heavy tiles where a strong bond is required to hold the tile in place.
Epoxy adhesives are usually only used by professional tilers due to the required mixing process and the super-fast drying time of about forty-five minutes. Epoxy adhesives can be used with the following tiles; ceramic, porcelain, glass, stone, metallic, mosaic, and pebbles.
A Note On Grout
Tile grout fills the spaces or gaps between the tiles. Grouting is available in many different colors and types. Most grouts are waterproof to prevent water from getting in under the tile.
The most commonly used grout is cement-based but below are a few more options:
- Epoxy Grout
- Furan Grout
- Acrylic Grout
- Cement Grout
- Latex Modified Grout
- Furan Resin Grout
- Quarry Type Grout
- Polyester Grout
- Polymer Grout
- Furan Resin
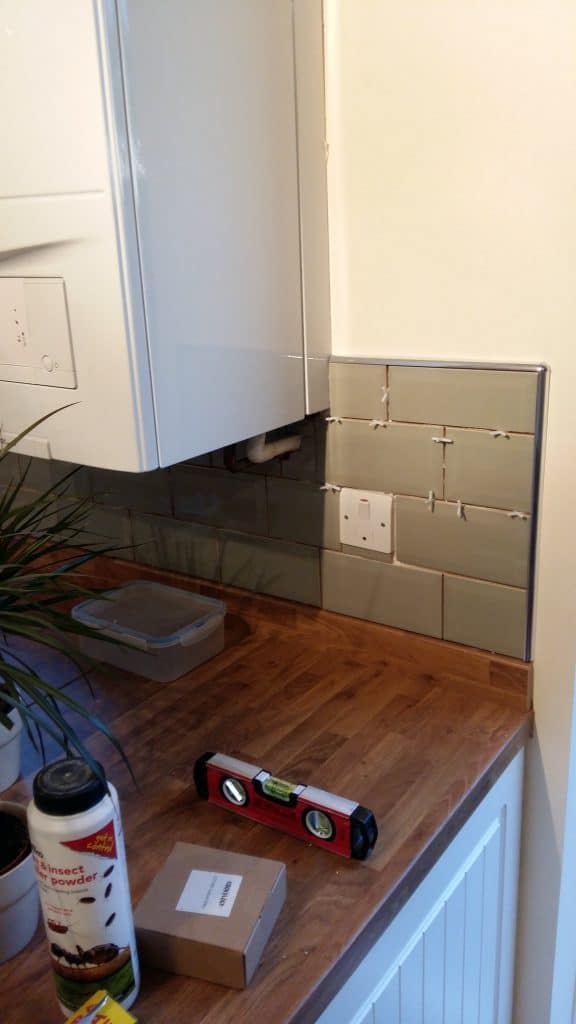
Using quality spacers is vital to ensure a good tile finish. Tile spacers ensure that the tiles’ gaps are consistent and support the tile while the adhesive is drying. Tile spacers are available in various sizes depending on the spacing required between the tiles.
How Many Rows Of Tiles Should You Tile At A Time?
When tiling a wall, gravity becomes a major factor to consider. Unlike tiling a floor where the tile lies flat on the floor, wall tiles are arranged vertically. If unsupported, they can potentially start sliding down the wall, especially if other tiles are pressing down on the tile from above.
In reality, the probability of this happening is pretty slim. Good quality tile adhesives and tricks of the trade significantly reduce the risk of a correctly laid tile slipping out of position once stuck into place, even when the adhesive is still wet.
However, heavy tiles such as ceramic tiles larger than 15″ do require support during the drying process. It is not advisable to lay large expanses of these tiles at once. Lay a maximum of two to three rows and allow the adhesive to start setting before continuing with the next rows.
Despite the relatively small chance of a standard-sized wall tile moving once you’ve set it into the adhesive, it is good practice to provide support between the tiles, especially under the bottom row of tiles, just in case.
Other Tiling Tips
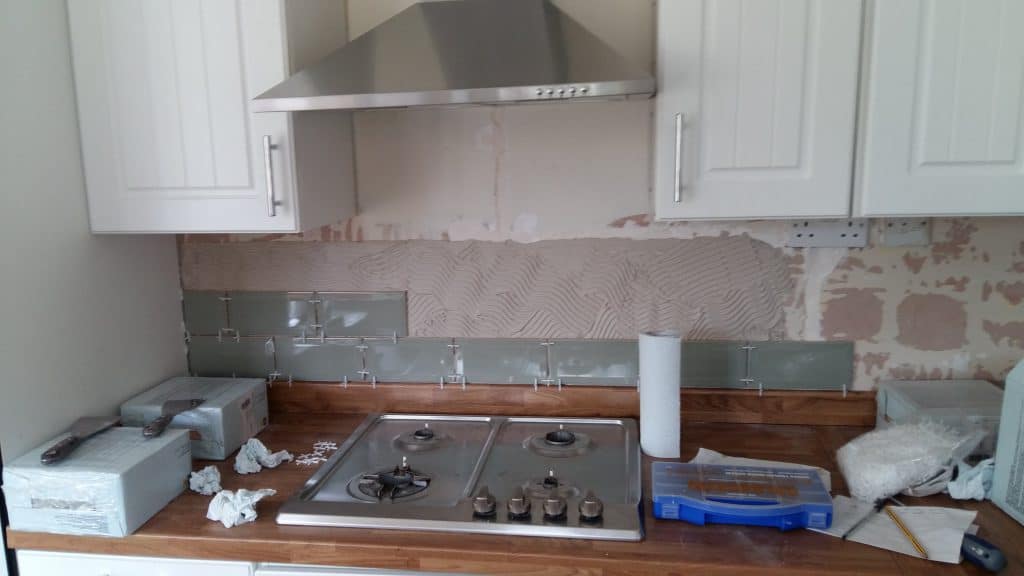
When tiling a wall, most tillers start in the middle and bottom of the wall, working out to the corners, completing one row at a time. Once the tile layout has been established, the actual tiling can begin.
When laying tiles, remember that they need to be spaced slightly apart to allow for expansion, so use appropriately sized tile spacers. The tile type and finish that you’re after will determine the size of the spacers used. Expansion gaps must run between the tiles, around the outside of the tiled wall, and along the edge of the floor.
Take advantage of this gap between the bottom row of tiles and the floor by inserting an appropriately sized spacer. The spacer will support the first row of tiles while the adhesive is wet and can then be removed when dry to allow the grout to be inserted.
A spacer of the appropriate thickness can be something as simple as a tile spacer lying flat on the floor, a thin wooden strip or board, etc., on which the tile rests. Do not use a spacer that will compress when weight is applied to it, as this can lead to crooked tiles.
Once the first row of tiles is completed, including inserted tile spacers, you’re ready to install row two and continue until the entire wall is tiled.
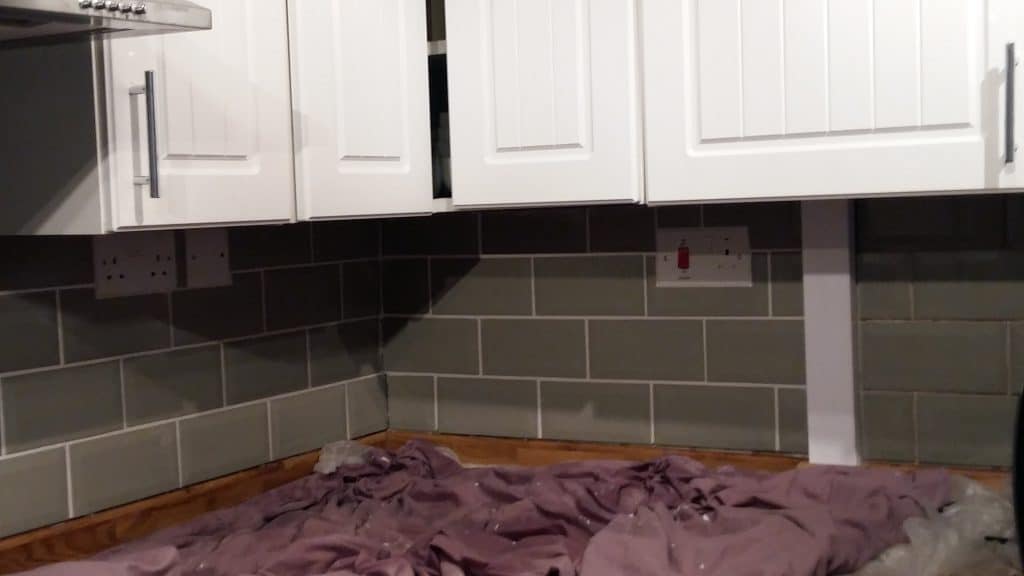
The key to tiling many rows in one go is to provide support at the bottom level of the tiles in the form of tile spacers. Correctly mixed tile adhesive is strong enough to prevent the tiles from slipping or falling off the wall once they have been seated in the adhesive.
The tile spacers inserted between each of the tiles’ four corners prevent any sideways movement of the tile, while the bottom-most spacer supports between the floor and the first row. Along with now partially drying adhesive, it makes tiling an entire wall in one go possible.
Allow 24 hours before removing the tile spacers and bottom row support; now, you’re ready to grout!