When looking to retile a drywall, one of the most common and troubling problems faced by DIY-ers and contactors alike is that you’ll end up losing some of the drywall along with the tiles. No matter how successful or how carefully you removed the old and outdated tiles, you are bound to face this issue.
The main culprit behind this issue is the adhesive you used when applying the tiles. In a perfect world, you would just cut out the grout, chisel the tiles away and be ready for the new tiles; but here, you will find that at least the paper will come off, if nothing else. Should you repair the drywall before tiling or is it safe to do so without performing repairs?
Yes, you should definitely repair the drywall before tiling to ensure the integrity of the new wall. You’re more than likely to find cracks, divots, or even holes in the drywall. If you choose to apply the new tiles on top of that damaged wall, you are going to find cracked or loose tiles in a matter of months! In this article, we will discuss what you need to do to install the new tiles properly.
Removing the Tiles – What to Expect & What to Do?
Before we get into the details of the how-to, let us consider what you’ll likely find as you remove your old tiles. Whether you had the previous tiles installed by a professional or did it yourself, you don’t have to curse the installer. It is perfectly normal to find a damaged drywall behind tiles.
While you won’t have to reinstall the drywall completely, expect to go to work on the wall, nonetheless. You will have to prep it. Every wall is different and depending on the technique used to install the tiles, you may find something entirely different.
However, in general when you remove the tiles, the first thing to go will be your drywall’s paper face. It will most likely come off with the adhesive attached to the tiles. For most, it’s just the top layer that comes off.
Some Quick ‘Top Tips’
In some cases where the tiles aren’t removed properly, the brown paper underneath also comes off. If that comes off, you might be in trouble. Wear a tin glove and feel the wall’s surface. If the surface is smooth, you’re in luck. You didn’t remove any gypsum. However, if the gypsum has been removed, it is important that you cover it up immediately without removing any more tiles. Wear a mask while doing this.
Exposed gypsum powder flies off very easily and can enter your lungs. While gypsum itself isn’t toxic, you may develop an allergy to the compound. If not covered properly, the dust will continue to fly and damage your lungs.
Use drywall putty or even tile adhesive if that’s nearer to cover it up. If you find that some gypsum has been removed, ventilate your room immediately and cover the exposed place up. If you just lost the paper while removing the tiles, you are fine. Feel free to even the wall up and tile over it; you’ll be fine.
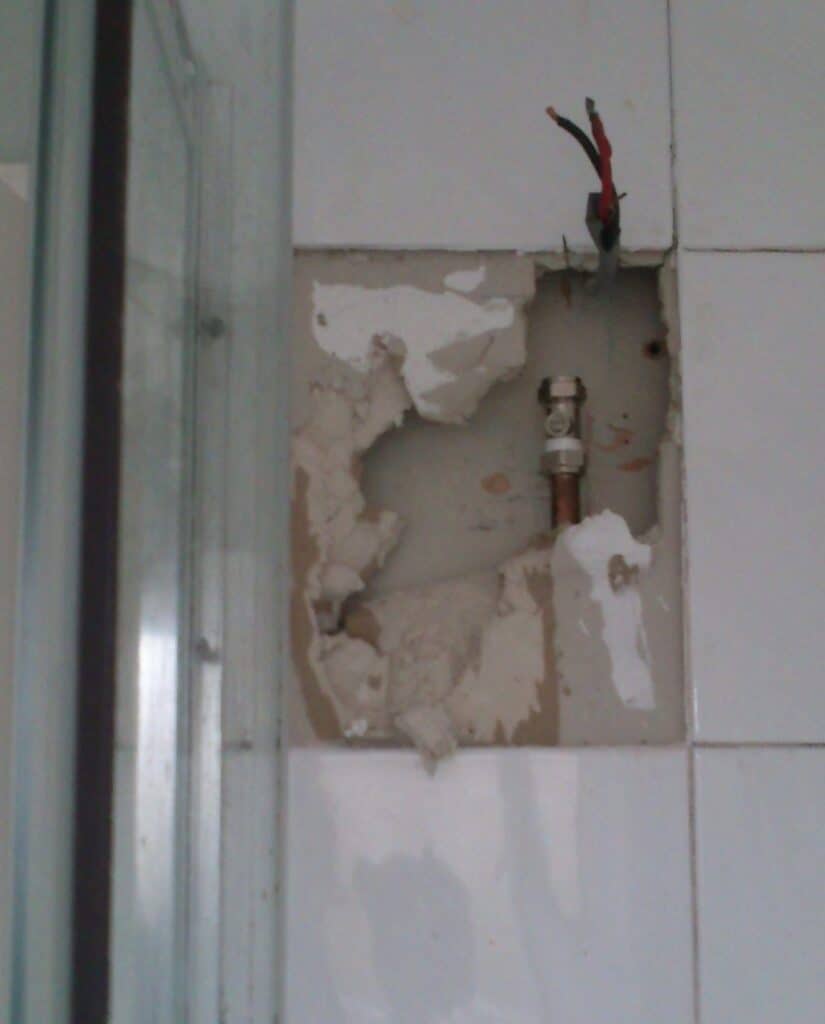
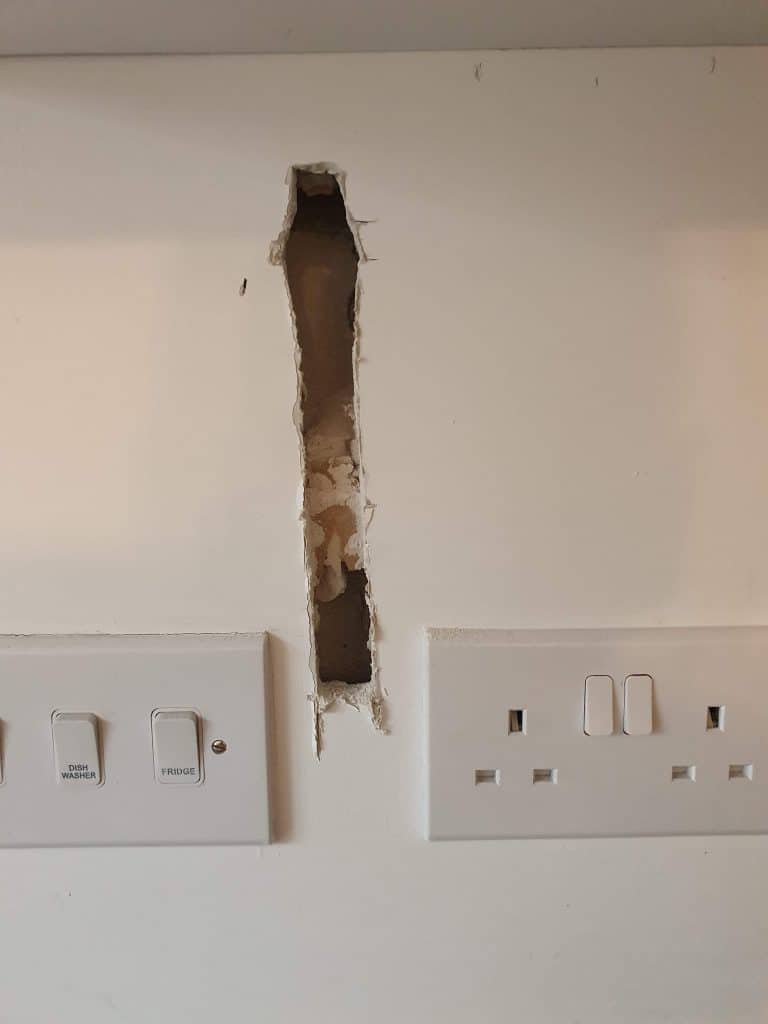
When removing kitchen backsplash tiles, you will likely lose some more material. The thin set might be damaged and there might also be some water damage. It isn’t uncommon for water damaged section(s) to completely fall out as you remove the tiles, so be prepared for that. In that case, you will definitely have to install new drywall.
In the UK, kitchen walls are usually concrete so you shouldn’t face this issue.
Other Issues You Might Face (& How To Avoid Them)
Oh, and a bit of advice, DO NOT USE SPEED SET DRYWALL ANYWHERE NEAR A HEAT SOURCE OR FLAME. Unless, of course, you want a huge burning hole in your wall.
Continue removing the tiles and you might also see some cracks in the wall. Leave those cracks for now and continue with what you’re doing. The most prevalent issue that you’ll face as you continue chiseling out tiles is going to be that of an uneven surface. Use a straight edge to mark how much you need to remove from bumps and how much to add in divot.
Remember to use some water when scrubbing off the bumps manually – makes the job a bit easier and also saves up on sanding costs. Once all the tiles are removed, take a step back and look for any mold spots or insect houses. These might be slightly difficult to spot, but if you fail to take care of them, they will quite literally continue to chew your house down hidden underneath the tiles.
We recommend a 3” scraper to scrap any lose material. 3” because it’s neither too large to be broken or chipped, nor is it too small to be as tiring. In some instances, people often use heaver meshes or cement fills when applying tiles. Remember to pull those off and apply new ones.
Personally, we don’t recommend you use these meshes. It’s great to add more strength to your wall, but a major inconvenience when you are looking to replace the tiles.
If you don’t have all these fancy tools, you can always use a simple razor to remove the grout and hammer to pry the tiles out. This way, you’ll do the least amount of damage possible, i.e., ripping the top paper layer off the drywall. In this case, you don’t need to repair the drywall before tiling.
If you find that your drywall has started to crumble, though, you should never tile over.
Prepping the Drywall Before Tiling
Once the tiles have been removed and gypsum covered (do this as you continue to remove tiles), it’s now time to start prepping your drywall for the new tiles. This requires some elbow grease, so make sure you aren’t already tired before you begin prepping. We recommend you finish it all in one go.
You will need the following;
- A 3” scrapper
- Sanding paper or sponge (go with a sanding block, if possible, to make things easier)
- Some water
- Spackle or joint compound
- Gloves, mask, goggles
- A knife or razor
- Drywall repair patches (if you find the wall is damaged)
OR
Plaster (if the damage isn’t as extensive)
Now, let’s get into the process itself. We are assuming you have removed all the tiles by now.
- Take a good look at the wall and identify any and all problems mentioned above.
- Start by first scraping off any debris or loose material. This would usually be the leftover adhesive or shriveled paper.
- Clean the floor below so that you don’t slip over the debris.
- Fill any divots you find with plaster. For a more detailed overview of how to do that, click here. If there are any major holes, mold, or insect nests, get rid of that section first.
- In case of mold, cut the section and dry the frame out with fans. Leave the fans on and windows open for at least 24 hours.
- For insect nests, just remove the patch and install another one.
- Once that is done, move on to sanding down bumps. Don’t overdo this part and keep your sander away from the plaster. Use water to soften up the drywall for easier removal.
- Use a straight edge to check the level. See if there is any loose debris. If there is, remove it and apply some plaster on it. If the debris is constantly falling and you risk turning it into something bigger, cover it up with spackle or joint compound or plaster.
- Check the level again and then start applying the tiles. An unlevel subfloor could result in damaged, cracked or even tenting tiles – so it’s important you get this step correct.