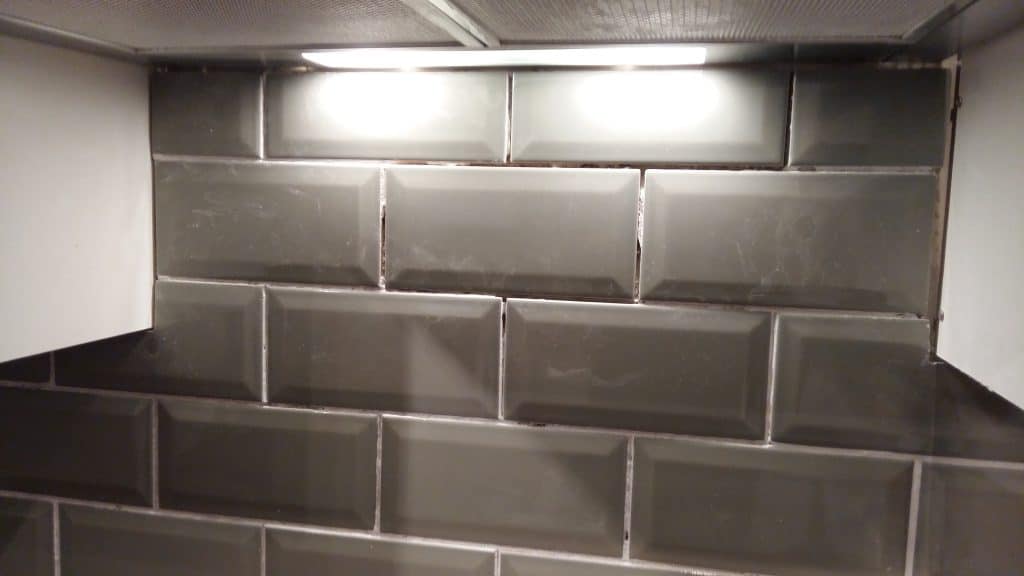
Construction workers are notorious for cutting corners when they know no one is looking or as they get closer to the finish line. One of the last bits that they need to work on includes filling grout between tiles. It isn’t uncommon to find thick and uneven grout lines when you move into a new construction home or a used home you just bought.
No matter how beautiful a tile is, if the grout isn’t applied correctly, the end product will look nothing short of ugly. Contractors usually take a long time to fix these because they’re really not that easy to ‘fix’. So how do you fix thick and uneven grout lines yourself? Is it something that a DIY-er can do?
Definitely. However, grout lines usually need to be ‘fixed’ before the grout dries up. Once dried, the best option you have at your disposal is to extract the grout entirely and apply new grout in its place. On the other hand, you could also use some at-home mixes or grout haze removers to clean it up. We’ll be discussing these options in detail below.
Dealing With Uneven & Thick Grout Lines

As mentioned above, grout is one of the most important aspects of any tiling job. Not only does it seal off the surface below, but it also adds significantly to the job’s aesthetic. The tiles aren’t as big a determinant as the grout lines are when it comes to improving the overall appeal of your room, so it stands to reason that your grout lines must be straight and even.
The solution to thick and uneven grout lines depends entirely on how long it has been since the grout was initially applied, i.e., whether it has dried out or not. For dried grout, you will have to remove it entirely and apply a new one. Surprisingly, this is relatively simpler than the alternative.
You also have the option of scrubbing your walls with an acid mix or the grout haze remover we mentioned above. This is also a very straightforward way of dealing with the issue but may require some elbow grease.
Applying new grout over the old one is relatively more difficult because grout, unlike caulk or silicon, is a rather rigid and inflexible material. It isn’t exactly strong, but it isn’t that weak either. Remember, the biggest issue won’t be removing grout (provided the tiles were applied correctly). The hardest part is cleaning up afterwards.
On the other hand, if you have just applied the grout (no more than 12 hours before), fixing the issue could be as simple as using a wet sponge!
Removing Old Grout

Let’s say that you had a new construction home built. As the project completion date drew nearer, you have to be at your old home helping your family pack up. Since you weren’t present, the contractor may end up doing a terrible job with tiling and you only find this out well after the grout lines have dried up.
If you ask the contractor to fix it, they won’t say no. They usually give you a year to let them know of any issues that are present in your house. However, they might take a lot of time doing the work, not to mention the inconvenience you’ll have to face.
The good news is that you can fix the problem yourself as a DIY-er – even if this is your first time! You will simply need a grout saw, utility knife or a small hacksaw blade to scrape away the grout. To make sure you don’t end up scratching the tiles, glass, or marble, a soft touch is recommended. Take your time.
Start by scraping away excess grout with the blade. Once the excess has been removed, take a step back and analyze the grout lines now. Are they even and to your satisfaction? If so, you are done!
If not, you will have to go deeper. We would recommend that you go with this option and remove all the grout in one go since the blade or saw is very likely to leave behind some scratch marks on the lines. Clean out the gaps between tiles, but make sure you don’t damage the substrate below, especially for walls! You could risk bringing down the tiles as well.
Wear a facemask when doing all this because there is most likely going to be a lot of dust and debris flying around. We recommend keeping a vacuum cleaner nearby and your space well-ventilated.
There is also the option of using grout haze remover. Grout haze is basically the residue left behind by the old contractor:

You can find these removers in ceramic tile stores near you very easily. if you’d like to make one on your own, you will need:
- 1 cup vinegar
- 1-gallon clean water
Adjust both ingredients according to how much you need, of course. Mix the two together and let the mixture rest for a minute or two. Remember to wear eye protection and gloves when applying the mix. Use a sponge and apply a generous coat on the haze. Let it sit there for a while. It will soften up the grout, which you can then easily remove with a knife or scraper (or even sandpaper if you are feeling adventurous).
Once the grout has been removed from between the tiles, let the place air a bit. Use a vacuum cleaner to remove the excess grout and debris and then apply the new grout. We will discuss how you can do that at the end of this article.
Removing Freshly Applied Grout

If you’re lucky enough to be around when the contractor was working on your tiles or if you yourself made a mistake when applying the grout and caught it within the first 12 hours (or less), the process becomes a lot simpler.
All you need is a wet sponge and two buckets. Fill one of the buckets with water and throw the sponge in there. Let it soak the water in properly. Leave the other one empty. Remove the sponge and drain it properly. Squeeze it until the sponge is just damp and start brushing it on top of the tiles.
Since the sponge is damp, it should loosen up some of the grout which will stick to the sponge. With every successive pass, you will be removing some grout, so make sure you don’t overdo it. Check the lines after every pass.
We recommend that you rinse your sponge in the empty bucket after every 2-3 passes to make sure you don’t leave any marks on your tiles.
If you applied the grout about an hour ago, things can get even easier for you. You will simply need a plastic card in this case. Take the card and set flush on both tiles and then drag it down. Make sure the card doesn’t get lifted.
As you go along the lines, your card should slice through the excess, giving you a flat surface. If you’re having trouble, apply some water on the card. Depending on how much excess there was, you may have to level the grout off after you’ve cut it.
How To Apply Grout Properly

Whether you’ve removed the old grout or are simply looking for tips to apply it properly in the first go, here is a detailed how-to to help you out. But before you get into the specifics of how to apply grout, first you need to consider what type of grout you are using.
Next, choose a grout color that matches your tiles. Pick one that complements them, and be very careful when doing so since it can make or break your tile design. For example, we prefer darker grout colors for areas with higher foot traffic.
You will then need:
- Grout
- A grout float
- A damp sponge
- A damp cloth
- Sealer
Once everything is collected, consider how much time you have to complete the task and how extensive your grouting project is. We recommend you complete the project once you start it. If you are short on time, postpone it.
You can divide the task into four stages:
- Mixing the grout
- Applying the grout
- Removing excess grout
- Cleaning the surface
You can either buy pre-made grout or mix one yourself. If this is your first time, we recommend you buy pre-made grout to ensure there are no lumps and the consistency is just right. Next:
- Pour the grout mix on the tiles. If you are applying it on the wall, make sure the grout isn’t runny.
- Spread it out using the grout float. We recommend using a hard-edged rubber float. When spreading it all out, hold it at roughly 45-degrees.
- Don’t try to cover the whole surface at a time. Work on a small area at a time; preferably a set of 4 tiles in one go.
- Drive grout into all the gaps with your float.
- Sweep diagonally across the tiles when removing excess grout. Drag it to one end and pick it up with a scraper.
- Remove as much as possible with the float and wait a few minutes.
- Once the grout has begun to harden, use a damp sponge to wipe the tiles. Be careful not to use a wet sponge. Use a circular motion to ensure maximum coverage. After every 4 tiles, wash the sponge off. Be careful around the tiles’ corners so as not to drag any grout out.
- After you’re done with the sponge, wait a while. As the grout hardens, you will find that the tiles are a bit hazy. Some white residue will be left on the tiles. Use a damp cloth on the surface lightly. In sections of 4 tiles at a time, clean the area with a wet cloth and immediately follow up with a dry cloth.
- Let the grout set and apply the sealer after at least 24 hours.
And you’re done!
