Electrical wiring can be a complex and intimidating subject for many homeowners and DIY enthusiasts. Whether you’re embarking on a new construction project or considering an electrical upgrade, understanding the basics of wiring is crucial to ensuring safety and efficiency. One of the fundamental aspects of electrical installations is choosing the appropriate wire size, and in this blog post, we will focus on a specific scenario: selecting the right Romex size for a 15-amp circuit.
Romex, a brand name for non-metallic sheathed (NM) electrical cable, is widely used in residential electrical systems for its versatility and ease of installation. However, it’s important to select the correct size of Romex to ensure that the circuit can safely handle the electrical load without overheating or causing other potential hazards.
In this article, we will delve into the factors to consider when determining the ideal Romex size for a 15-amp circuit. We will explore the concept of amperage, the National Electrical Code (NEC) guidelines, and the importance of correctly matching wire size to the circuit’s capacity.
By the end of this post, you’ll have a solid understanding of the considerations involved in selecting the appropriate Romex size, empowering you to tackle your electrical projects with confidence.
Understanding Amperage and Romex Wire Sizing
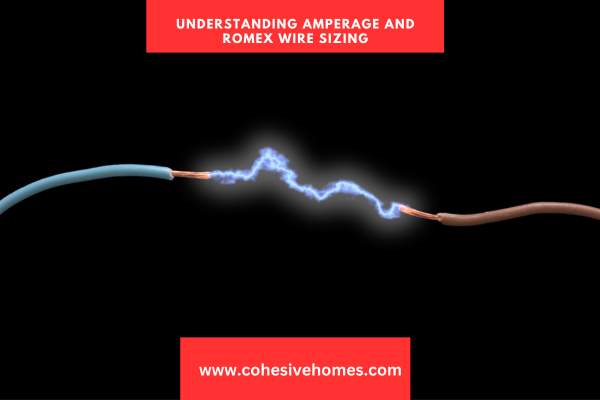
Amperage, often referred to as “amps,” is a crucial concept to grasp when it comes to electrical wiring.
It represents the amount of electrical current flowing through a circuit at any given time.
Select Romex wire size for 15-amp circuits that can handle maximum loads without safety risks or overheating.
Romex, a brand name for non-metallic sheathed (NM) electrical cable, is commonly used in residential electrical installations due to its flexibility and ease of use.
The size of the Romex wire, also known as the gauge, directly affects its ampacity, which is the maximum amount of current it can safely carry.
In the case of a 15-amp circuit, the wire size should be selected to accommodate this specific amperage requirement.
To determine the appropriate Romex wire size for a 15-amp circuit, it’s important to consult the guidelines outlined in the National Electrical Code (NEC).
The NEC provides standardized regulations and recommendations for electrical installations, ensuring safety and consistency across the industry.
These guidelines consider various factors such as wire length, ambient temperature, and the type of conductor insulation.
Choosing the right wire size is vital to prevent hazards like overheating, voltage drops, and fire risks.
On the other hand, using oversized wire might be unnecessary and result in wasted resources.
Make informed decisions on Romex wire size for 15 amp circuits by following NEC guidelines and load calculations.
In the next sections, we will explore the factors to consider when selecting Romex for a 15-amp circuit, delve into the NEC guidelines related to wire sizing, and discuss best practices for installation.
Choose the correct Romex size for 15-amp circuits to ensure a safe and efficient electrical system.
The Importance of Choosing the Right Romex Size

When it comes to electrical installations, choosing the correct Romex wire size is of utmost importance.
The Romex wire serves as the lifeline of your electrical system, carrying power to all the devices and appliances in your home.
Using the wrong size of Romex wire can have significant consequences, ranging from performance issues to safety hazards.
One of the primary reasons for selecting the right Romex size is to ensure the circuit’s capacity matches the electrical load it will bear.
Each circuit has a specific ampacity rating, which indicates the maximum amount of electrical current it can safely handle.
If the Romex wire is too small for the circuit’s intended load, it can lead to overheating, voltage drops, and even electrical fires.
Conversely, using an oversized Romex wire is unnecessary and can result in wasted resources.
Choosing the appropriate Romex size also ensures compliance with electrical codes and standards, such as the National Electrical Code (NEC).
These codes are designed to promote safety and prevent electrical hazards.
Failure to adhere to the prescribed wire size requirements can not only jeopardize the safety of your electrical system but also result in code violations and potential penalties.
Furthermore, the correct Romex wire size contributes to the overall efficiency and performance of your electrical system.
Properly sized wires minimize energy losses and voltage drops, allowing your devices and appliances to operate optimally.
National Electrical Code (NEC) Guidelines for 15-Amp Circuits
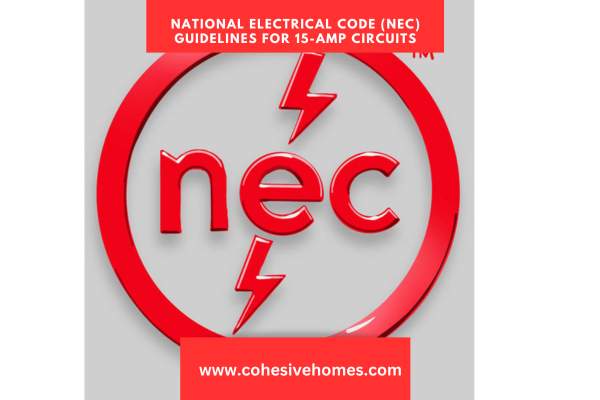
The National Electrical Code (NEC) provides comprehensive guidelines and standards for electrical installations in the United States.
When it comes to 15-amp circuits, the NEC offers specific requirements to ensure the safe and efficient operation of electrical systems.
Here are some key guidelines to consider:
Wire Size
According to NEC guidelines, a 15-amp circuit typically requires a minimum wire size of 14 AWG (American Wire Gauge). This wire size is capable of safely carrying a maximum continuous load of 15 amps.
Overcurrent Protection
The NEC mandates that all circuits must be protected from overcurrent, which refers to excessive current flow that can lead to overheating and potential hazards. For a 15-amp circuit, an appropriate overcurrent protective device, such as a circuit breaker or fuse, should be installed to prevent current overload.
Device Rating
The NEC also specifies that devices, such as switches, outlets, and receptacles, used in 15-amp circuits must be rated to handle the corresponding ampacity. This ensures that the devices are capable of safely supporting the electrical load without overheating or malfunctioning.
Voltage Drop Considerations
While not specific to 15-amp circuits alone, the NEC includes guidelines for voltage drop, which is the decrease in voltage that occurs as current flows through a wire.
To maintain proper electrical performance, the NEC recommends limiting voltage drop to a certain percentage.
Calculating and mitigating voltage drop is particularly important for longer wire runs in 15-amp circuits to prevent issues like diminished device operation or excessive energy losses.
It is essential to consult the current version of the NEC and any applicable local electrical codes for the most up-to-date guidelines and regulations specific to your region.
Adhering to these guidelines not only ensures compliance with safety standards but also helps create a reliable electrical system that performs optimally and minimizes potential risks.
Remember, if you are not familiar with electrical work or are unsure about any aspect of your project, it is always best to consult with a qualified electrician who can provide expert guidance and ensure that your installations meet NEC requirements.
Calculating Load Capacity: Determining the Correct Wire Size

Calculate load capacity to determine the correct wire size for safe electrical current transmission.
Calculate load capacity to select the right wire size for a safe and efficient electrical system. Here are the key steps involved:
- Identify the Load: Begin by determining the total electrical load that the circuit will supply. This includes all the devices, appliances, and equipment connected to the circuit. The load is typically measured in watts (W) or amps (A) and can often be found on the device’s label or specification sheet.
- Calculate the Total Current: Once you have the load in watts, you can calculate the total current using Ohm’s Law. The formula is I = P / V, where I represents current in amps, P represents power in watts, and V represents voltage (typically 120V for residential circuits). If your load is given in amps, you can skip this step.
- Consider the Circuit’s Continuous or Non-continuous Nature: Determine if the circuit will carry a continuous load or a non-continuous load. Differentiate continuous and non-continuous loads based on their operating duration for accurate wire size selection. Continuous loads require additional considerations for wire sizing.
- Apply the Appropriate Load Factor: For continuous loads, multiply the calculated total current by a load factor of 125%. This accounts for the sustained demand on the circuit and prevents overloading. For non-continuous loads, use the calculated total current as is, without applying the load factor.
- Refer to NEC ampacity tables to select the correct wire size based on the adjusted total current. These tables correlate wire sizes (measured in American Wire Gauge, or AWG) with their respective ampacity ratings. Choose a wire size that can safely carry the adjusted total current without exceeding its ampacity.
It’s important to note that wire sizes increase as the gauge number decreases.
Romex Options for 15-Amp Circuits: Common Sizes and Capacities
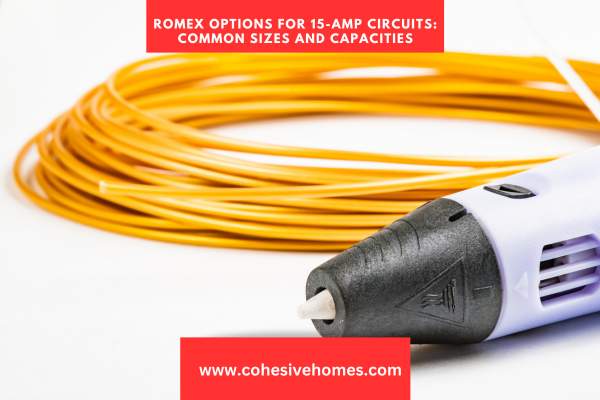
When it comes to selecting the appropriate Romex wire for a 15-amp circuit, several common sizes and capacities are available to meet your electrical needs.
Romex, also known as non-metallic sheathed (NM) cable, offers a range of options that provide flexibility and ease of installation.
One commonly used Romex size for 15-amp circuits is 14/2. The “14” indicates the wire gauge (AWG), and the “2” represents the number of current-carrying conductors within the cable.
A 14/2 Romex cable consists of a black wire (hot), a white wire (neutral), and a bare copper wire (ground). It has an ampacity rating of 15 amps, making it suitable for general-purpose residential circuits.
For 15-amp circuits with higher-demand appliances or longer wire runs, the 12/2 Romex is often used.
It has larger conductors and a higher ampacity rating of 20 amps. Like the 14/2 Romex, it consists of a black wire (hot), a white wire (neutral), and a bare copper wire (ground).
If your electrical needs require additional functionality, the 12/3 Romex might be suitable.
In addition to the black wire (hot), white wire (neutral), and bare copper wire (ground), it includes a red wire.
This configuration allows for applications such as three-way switches or multi-wire branch circuits. The 12/3 Romex also has an ampacity rating of 20 amps.
It’s important to consider factors such as the length of the wire run, the type of load being served, and any specific electrical code requirements in your area when selecting the appropriate Romex size.
Always consult the National Electrical Code (NEC) and local regulations to ensure compliance and safety.
Whether you’re working on a simple residential project or a more complex electrical installation, consulting with a qualified electrician can provide expert guidance tailored to your specific needs.
Best Practices for Installing Romex on a 15-Amp Circuit

| Best Practice | Description |
| Use the Correct Romex Size | Select the appropriate Romex size based on the circuit’s ampacity. |
| Follow National Electrical Code (NEC) | Adhere to NEC guidelines and local electrical codes for safety. |
| Plan the Wiring Route | Carefully plan the path of the Romex to avoid unnecessary bends or sharp turns that could damage the cable. |
| Protect the Romex | Secure the Romex cable using staples or other approved fasteners, ensuring it is protected from physical damage. |
| Avoid Overloading the Circuit | Calculate the total electrical load and ensure it does not exceed the circuit’s ampacity. |
| Properly Strip and Terminate the Wires | Strip the Romex wires to the appropriate length and terminate them securely using approved connectors. |
| Maintain Proper Wire Length | Avoid excessive wire lengths, as they can result in voltage drops and decreased circuit performance. |
| Separate Romex from Plumbing or HVAC Systems | Keep the Romex cable at a safe distance from plumbing or HVAC components to prevent potential damage. |
| Install Ground Fault Circuit Interrupters (GFCIs) | Consider installing GFCIs in areas where electrical outlets may come into contact with water, such as kitchens and bathrooms. |
| Label Circuit Breakers and Outlets | Properly label circuit breakers and outlets to facilitate future troubleshooting and maintenance. |
These best practices help ensure a safe and efficient installation of Romex on a 15-Amp circuit. Always consult with a qualified electrician and refer to the latest NEC guidelines and local electrical codes for specific requirements in your area.
Common Mistakes to Avoid When Selecting Romex for 15-Amp Circuits

Selecting the right Romex wire for a 15-Amp circuit is crucial for the safety and performance of your electrical system.
To ensure a successful installation, it’s important to avoid some common mistakes that can lead to issues down the line. Here are a few mistakes to steer clear of:
Choosing the Wrong Wire Size
One of the most common mistakes is selecting the incorrect wire size. Using undersized Romex wire can lead to overheating, voltage drops, and potential safety hazards. On the other hand, using oversized Romex wire is unnecessary and can result in wasted resources.
Always refer to the National Electrical Code (NEC) guidelines and consider factors such as ampacity requirements and the length of the wire run to determine the appropriate wire size.
Ignoring Voltage Drop Considerations
Voltage drop is the decrease in voltage that occurs as current flows through a wire. Neglecting to account for voltage drop can lead to poor electrical performance, especially over longer wire runs.
Calculate the anticipated voltage drop and ensure it falls within acceptable limits. The NEC provides guidelines for maximum voltage drop values for different applications.
Neglecting Load Calculations
Failure to accurately calculate the total electrical load can result in overloaded circuits. Consider all the devices, appliances, and equipment that will be connected to the 15-Amp circuit and ensure the Romex wire selected can handle the anticipated load.
Failure to do so can lead to tripped breakers, overheating, and potential electrical hazards.
Not Consulting Electrical Codes and Regulations
Electrical codes and regulations, such as the NEC, provide important guidelines for electrical installations. Ignoring these codes can result in code violations and potential safety issues.
Always consult the latest version of the NEC and any local electrical codes to ensure compliance with wiring methods, grounding requirements, and other safety considerations.
Neglecting Safety Precautions
When working with electrical installations, it’s crucial to prioritize safety. Avoid working on live circuits whenever possible and take precautions such as wearing appropriate personal protective equipment (PPE).
Ensure the Romex wire is properly secured, protected from physical damage, and installed away from potential hazards like plumbing or HVAC systems.
By avoiding these common mistakes and following best practices, you can ensure a successful and safe installation of Romex on your 15-Amp circuits. If you’re uncertain or unfamiliar with electrical work, it’s always best to consult with a qualified electrician who can provide expert advice and assistance.
Conclusion
Selecting the correct Romex wire for a 15-Amp circuit is essential for a safe and efficient electrical installation.
By avoiding common mistakes such as choosing the wrong wire size, neglecting voltage drop considerations, overlooking load calculations, disregarding electrical codes, and neglecting safety precautions, you can ensure a successful wiring project.
Adhering to the National Electrical Code (NEC) guidelines, calculating the load accurately, and considering factors like voltage drop and wire length will help you make informed decisions when selecting Romex wire.
Consulting with a qualified electrician and following best practices will further enhance the safety and reliability of your electrical system.
Remember, the proper selection and installation of Romex wire contribute to the longevity and performance of your electrical circuits.
By prioritizing safety, complying with electrical codes, and seeking professional guidance when needed, you can achieve a successful Romex installation for your 15-Amp circuits.
Always prioritize safety, consult relevant guidelines, and ensure compliance with local regulations. By doing so, you’ll create a robust electrical system that operates reliably and provides peace of mind for years to come.
FAQS
What’s the difference between 14/2 and 12/2 Romex for a 15-Amp circuit?
The main difference is the wire gauge. 12/2 Romex has larger conductors and a higher ampacity rating of 20 amps, while 14/2 Romex is suitable for general-purpose 15-Amp circuits.
Can I use 12/2 Romex for a 15-Amp circuit instead of 14/2 Romex?
Yes, 12/2 Romex can be used for a 15-Amp circuit. Just ensure other components are also rated for 20 amps and accommodate the thicker wires.
Can I use a 14/3 Romex for a 15-Amp circuit?
Yes, 14/3 Romex is suitable for a 15-Amp circuit. It provides an additional wire for specific applications like three-way switches or multi-wire branch circuits. Follow NEC guidelines and wiring diagrams for proper usage.