Hey there! So, you’re looking to learn the best ways to strip Romex, huh? Well, you’ve come to the right place! Whether you’re a DIY enthusiast or a seasoned electrician, knowing how to strip Romex properly is an essential skill for any electrical project.
Romex, for those who might not be familiar, is a brand name for a type of electrical cable commonly used in residential wiring. It consists of two or more insulated wires, typically with a ground wire, all bundled together in a sheathing.
Now, the process of stripping Romex involves removing the outer sheathing to expose the individual wires within, allowing for proper connections to be made.
In this blog post, we’ll guide you through the step-by-step process of stripping Romex, covering the tools you’ll need, safety precautions to keep in mind, and some handy tips to make the job easier. We’ll aim to keep things conversational and easy to understand, so you can confidently tackle your next electrical project.
Getting Started with Stripping Romex

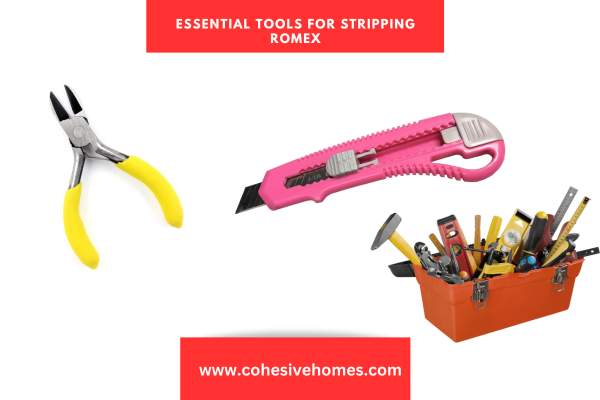
To begin with stripping Romex, you’ll need a few essential tools: wire cutters, wire strippers, and either a utility knife or a Romex stripper tool.
These tools will assist you in removing the outer sheathing and stripping the insulation from the individual wires.
Before getting started, prioritize safety.
Ensure that the power to the circuit you’ll be working on is turned off. Wearing safety gear like gloves and safety glasses is crucial to protecting yourself from potential hazards.
Inspect the Romex cable closely and identify the type and size of the wires inside.
This information will help you determine the appropriate stripping method and the gauge of wire stripper to use.
Prepare the Romex cable by using wire cutters to trim it to the desired length for your electrical project.
Be sure to leave enough excess length for making connections.
There are different methods for stripping Romex, depending on the available tools and personal preference.
You can choose to use a utility knife to carefully cut and remove the sheathing or opt for a Romex stripper tool designed specifically for this purpose.
Follow the instructions provided by the manufacturer for the best results.
After removing the outer sheathing, it’s time to strip the insulation from the individual wires within the Romex cable.
Use the appropriate gauge of wire stripper to remove a small portion of insulation from the ends of each wire, exposing the bare copper or aluminum conductor.
Remember to prioritize safety throughout the process, double-check your work, and consult with a professional if you have any doubts or concerns.
Following these steps will help you get started with stripping Romex for your electrical projects.
Essential Tools for Stripping Romex
When it comes to stripping Romex, having the right tools at your disposal is essential for a smooth and efficient process.
Here are the key tools you’ll need:
Wire Cutters: Wire cutters are used to trim the Romex cable to the desired length. They have sharp blades designed to cut through the outer sheathing easily.
Wire Strippers: Wire strippers are specialized tools that allow you to remove the insulation from the individual wires within the Romex cable. They come in various sizes and have notches or holes matched to different wire gauges.
Utility Knife: A utility knife can be used as an alternative to wire strippers for cutting and removing the outer sheathing of the Romex cable. Make sure to use a sharp and precise utility knife to avoid damaging the wires.
Romex Stripper Tool: A Romex stripper tool is specifically designed for stripping Romex cables. It typically features multiple cutting and stripping options for different wire sizes, making the stripping process quicker and more accurate.
Safety Gear: Safety should always be a priority. Wear gloves and safety glasses to protect yourself from potential hazards while handling the Romex cable and using the stripping tools.
Having these tools on hand will ensure that you have everything you need to strip Romex effectively and safely.
Remember to choose the appropriate tool for each step of the process and follow the manufacturer’s instructions for optimal results.
Safety First: Precautions When Stripping Romex

When it comes to working with electricity and stripping Romex, prioritizing safety is of utmost importance. Here are some essential precautions to keep in mind:
Before you begin, make sure to turn off the power to the circuit you’ll be working on.
This will prevent any electrical current from flowing through the wires and minimize the risk of electric shock.
Additionally, wear the appropriate safety gear, such as insulated gloves and safety glasses.
Insulated gloves provide protection against electric shocks, while safety glasses safeguard your eyes from debris or accidental wire slippage.
Before stripping Romex, thoroughly inspect the cable for any signs of damage or wear.
If you notice frayed or damaged wires, it’s best to replace the cable instead of attempting to strip it. Damaged wires can pose serious safety hazards.
Ensure you have the correct tools for the job, including wire cutters, wire strippers, and either a utility knife or a Romex stripper tool.
Using improper tools can result in accidents or damage to the Romex cable.
Work in a well-lit area to ensure clear visibility and minimize errors or accidental cuts.
If possible, avoid working alone and have someone nearby in case of emergencies or accidents.
Having another person present can provide assistance or quickly call for help if needed.
Take your time and exercise caution while stripping Romex. Precision and attention to detail are essential.
Avoid rushing the process, and be careful when handling the utility knife or any sharp tools to prevent injuries.
A Step-by-Step Guide to Stripping Romex

Stripping Romex involves removing the outer sheathing and stripping the insulation from the individual wires within the cable. Here’s a step-by-step guide to help you through the process:
Stripping Romex involves removing the outer sheathing and stripping the insulation from the individual wires within the cable. Here’s a step-by-step guide to help you through the process:
- Gather your tools: Before you begin, ensure you have the necessary tools on hand, including wire cutters, wire strippers, and either a utility knife or a Romex stripper tool.
- Turn off the power: It’s crucial to turn off the power to the circuit you’ll be working on. This step prevents any electrical current from flowing through the wires and reduces the risk of electric shock.
- Inspect the Romex cable: Take a close look at the Romex cable and identify the type and size of the wires inside. This information will help you choose the appropriate stripping method and the right gauge of wire stripper.
- Measure and cut the cable: Use wire cutters to trim the Romex cable to the desired length for your electrical project. Leave some excess length for making connections.
- Choose the stripping method: Depending on your preference and the tools available, you can either use a utility knife or a Romex stripper tool. If using a utility knife, carefully score the outer sheathing along the length of the cable and then peel it away. If using a Romex stripper tool, follow the manufacturer’s instructions to cut and remove the sheathing.
- Strip the individual wires: Once the outer sheathing is removed, you’ll see the individual wires inside. Use the appropriate gauge wire stripper to remove a small portion of insulation from the ends of each wire, exposing the bare copper or aluminum conductor. Be cautious not to damage the wire while stripping the insulation.
- Check your work: After stripping the wires, double-check them for any remaining insulation or nicks in the conductors. It’s crucial to ensure the wires are properly stripped and undamaged for safe and secure electrical connections.
Common Mistakes to Avoid When Stripping Romex

| Common Mistakes | How to Avoid Them |
| Cutting too deeply with a utility knife | Take your time and make shallow cuts. Avoid applying excessive pressure that could damage the wires inside. |
| Using the wrong wire stripper gauge | Ensure you have the correct gauge of wire stripper for the size of the Romex cable you’re working with. Using a stripper with the wrong gauge may result in ineffective stripping or damage to the wires. |
| Neglecting to turn off the power | Always turn off the power to the circuit you’re working on to prevent electrical shocks or accidents. Double-check that the power is off before proceeding. |
| Rushing the stripping process | Stripping Romex requires precision. Take your time to avoid mistakes or unintentional damage to the wires. Rushing can lead to uneven cuts or nicks on the conductors. |
| Failing to inspect the Romex cable | Before stripping, thoroughly examine the cable for any signs of damage or wear. Using damaged cable can be hazardous and affect the quality of your electrical connections. |
| Not wearing proper safety gear | Ensure you wear insulated gloves and safety glasses throughout the process. Protecting yourself from potential electrical hazards and flying debris is essential. |
| Stripping too much insulation from the wires | Be cautious when stripping the individual wires. Strip only a small portion of insulation to expose the conductor. Removing too much insulation can weaken the wire or lead to shorts. |
| Overlooking the need for professional assistance | If you’re uncertain or uncomfortable with stripping Romex, it’s best to seek help from a qualified electrician. They can provide guidance and ensure the task is performed safely and accurately. |
Avoiding these common mistakes will help you strip Romex effectively while ensuring the safety and integrity of your electrical connections.
Conclusion

In conclusion, mastering the art of stripping Romex requires attention to safety, proper techniques, and the right tools.
By following the step-by-step instructions, avoiding common mistakes, and seeking professional help when needed, you can confidently handle Romex stripping for your electrical projects.
Remember to prioritize safety at all times and enjoy the satisfaction of successfully preparing Romex wires for your electrical endeavors.
FAQS
Can I strip Romex without turning off the power?
No, it is crucial to turn off the power to the circuit before stripping Romex. This ensures your safety by preventing electric shocks and accidents.
What is the recommended tool for stripping Romex?
The recommended tool for stripping Romex is a wire stripper. Choose one that matches the gauge of the Romex cable you are working with to ensure accurate and safe stripping.
What should I do if I accidentally nick or damage a wire while stripping Romex?
If you accidentally nick or damage a wire, it is best to replace the damaged section with a new piece of Romex cable. It is essential to maintain the integrity of the wires for reliable electrical connections.