Electrical wiring is the backbone of our modern homes, ensuring the safe and efficient delivery of power to our appliances and devices. Whether you’re a homeowner embarking on a DIY electrical project or a professional electrician, understanding the basics of electrical wiring is crucial. One fundamental aspect is selecting the appropriate wiring size, such as Romex, to match the specific electrical requirements of each circuit.
In this blog post, we’ll dive into the world of Romex and explore the significance of choosing the right size when dealing with a 20 amp circuit.
We’ll unravel the technical jargon, simplify the selection process, and provide you with the essential knowledge you need to ensure a safe and code-compliant electrical installation.
The Importance of Choosing the Right Romex Size for a 20 Amp Circuit

When it comes to electrical wiring, size matters. Selecting the correct Romex size for a 20 amp circuit is crucial for several reasons.
Firstly, it ensures that the wire can handle the current load without overheating, which can lead to safety hazards like electrical fires.
Secondly, it ensures compliance with the National Electrical Code (NEC) regulations, which mandate specific wire sizes based on the amperage of the circuit.
By choosing the right Romex size, you not only protect your electrical system but also adhere to industry standards for safety and code compliance.
Decoding Ampacity: What It Means for Your Wiring

Ampacity refers to the maximum amount of electrical current that a wire can safely carry without exceeding its temperature rating.
It is an essential factor to consider when selecting Romex for a 20 amp circuit. The ampacity of a wire is determined by various factors, including its size, insulation type, and installation conditions.
The NEC provides ampacity tables and guidelines to help electricians and homeowners determine the appropriate wire size based on the expected load and circuit amperage.
It is crucial to understand and adhere to these ampacity ratings to ensure the safe and efficient operation of your electrical system.
Benefits of Proper Romex Sizing: Safety, Efficiency, and Longevity

Properly sizing Romex for a 20 amp circuit offers several significant benefits.
First and foremost, it ensures safety by preventing wire overheating and reducing the risk of electrical fires.
When wires are not sized correctly, excessive heat can build up due to the high current flowing through an undersized wire, potentially causing insulation damage or even a fire hazard.
By choosing the appropriate Romex size, you provide adequate capacity for the circuit, minimizing the risk of dangerous heat buildup.
Additionally, proper Romex sizing enhances overall electrical system efficiency.
When wires are sized correctly, there is minimal voltage drop along the circuit.
Voltage drop occurs when the resistance of the wire causes a decrease in voltage as the current travels through it.
By using the recommended Romex size, you ensure efficient power delivery to your appliances and reduce energy waste.
Furthermore, selecting the right Romex size promotes the longevity and durability of your electrical system.
Undersized wires can experience higher resistance, leading to increased wear and tear over time.
By using the appropriate gauge, you minimize resistance and maximize the lifespan of your wiring, reducing the need for repairs or replacements down the line.
Step-by-Step Guide: Installing Romex for a 20 Amp Circuit
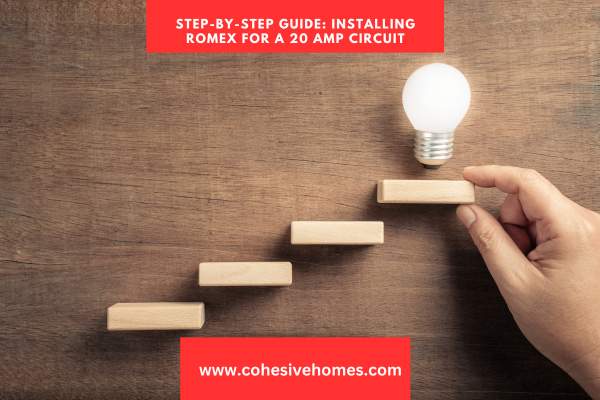
Installing Romex on a 20-amp circuit requires careful planning and execution. Here is a step-by-step guide to help you through the process:
- Determine the circuit requirements: Identify the specific electrical needs of the circuit and ensure that a 20-amp breaker is installed in the electrical panel.
- Calculate the wire length: Measure the distance between the electrical panel and the point of use to determine the length of Romex needed.
- Consult the ampacity table: Refer to the ampacity table in the NEC to determine the appropriate wire size based on the circuit’s length and the expected load.
- Gather the necessary tools and materials. This includes Romex cable, wire strippers, wire connectors, electrical tape, and any other required tools for the installation.
- Turn off the power. Shut off the power to the circuit you’ll be working on by switching off the corresponding breaker in the electrical panel.
- Run the Romex: Carefully route the Romex cable along the desired path, ensuring it is properly secured and protected from potential damage.
- Make connections: Strip the outer sheath of the Romex cable and connect the individual conductors to the appropriate terminals, following wiring diagrams and color-coding conventions.
- Secure and ground the cable: Fasten the Romex cable securely to studs or joists using appropriate staples or clamps. Ensure the grounding wire is connected to the grounding system of the electrical panel.
- Test and verify: Once the Romex installation is complete, restore power to the circuit and use a voltage tester to verify that the connections are working correctly.
- Inspect and cover: After confirming proper functionality, ensure that the Romex is covered and protected according to local building codes, such as with wall plates or conduit where necessary.
Install Romex on your 20-amp circuit safely and effectively with our step-by-step instructions for a reliable electrical system.
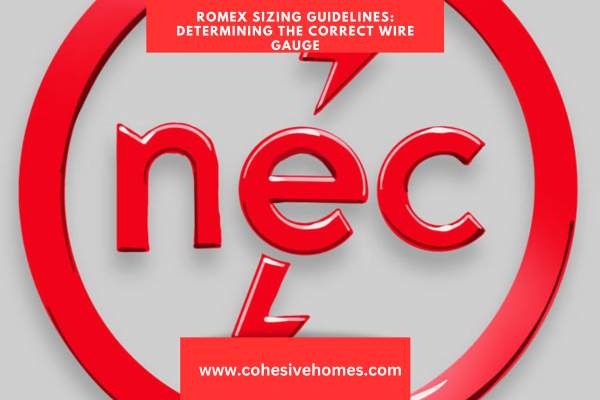
Romex Sizing Guidelines: Determining the Correct Wire Gauge
Choosing the correct wire gauge, or size, is vital for maintaining the integrity and safety of your electrical system.
The wire gauge determines the cross-sectional area of the conductor, which directly impacts its ampacity and ability to handle the electrical current.
For a 20-amp circuit, the NEC typically recommends using 12-gauge Romex.
The 12-gauge wire is designed to handle the 20-amp load safely and efficiently.
However, it is essential to consult the NEC and local electrical codes, as requirements may vary depending on factors such as wire length, ambient temperature, and the specific application.
By following the Romex sizing guidelines, you can ensure that your electrical system operates reliably and reduces the risk of electrical hazards.
Factors to Consider When Selecting Romex for a 20-Amp Circuit

Choosing the right Romex for a 20-amp circuit involves considering several factors beyond just wire size.
One crucial aspect is the length of the wire run. Longer wire runs result in increased resistance, which can lead to voltage drops and reduced efficiency.
To mitigate this, you may need to choose a larger wire gauge, such as 10-gauge Romex, to compensate for the longer distance.
Additionally, the ambient temperature of the installation area plays a role.
Higher temperatures can affect the ampacity of the wire, necessitating the use of a larger gauge to handle the heat generated.
Lastly, consider the specific application and the expected load on the circuit.
If you anticipate heavy power usage, such as with certain appliances or equipment, it may be prudent to opt for a larger wire size to accommodate the additional current.
Remember to expand upon these paragraphs with more detailed information and any relevant tips or considerations.
Upgrading Existing Wiring: When and How to Replace Romex

In some instances, you may need to upgrade or replace existing wiring, including Romex, to accommodate changes in electrical requirements or to ensure compliance with current safety standards.
Here are some factors to consider when upgrading existing Romex:
- Circuit load: Assess the load requirements of the circuit and determine if the existing Romex can handle the increased demand. If not, it may be necessary to replace the wiring with a higher gauge to meet the new load requirements.
- Code compliance: Check local electrical codes to ensure your existing Romex meets current safety standards. If not, upgrading to comply with the latest codes may be necessary.
- Age and condition: Evaluate the age and condition of the existing Romex. Over time, wiring insulation can deteriorate, leading to safety hazards. If the Romex is old or damaged, it’s advisable to replace it with new wiring.
- Renovations or additions: If you’re undertaking renovations or adding new electrical devices or circuits, it’s important to evaluate if the existing Romex can adequately support the additional load. Upgrading may be necessary to ensure safety and performance.
When replacing Romex, it’s crucial to follow the same installation procedures as for new installations.
This includes selecting the appropriate wire size, making secure connections, properly grounding the system, and ensuring compliance with local electrical codes.
By understanding when and how to upgrade existing Romex, you can maintain a safe and efficient electrical system that meets your current needs.
Conclusion
Selecting the right Romex size for a 20-amp circuit is a critical aspect of electrical wiring.
By understanding the importance of proper sizing, considering factors such as ampacity and compliance with the National Electrical Code, and following installation guidelines, you can ensure a safe and efficient electrical system.
Choosing the correct Romex size provides numerous benefits, including enhanced safety, improved efficiency, and increased longevity of your electrical system.
By preventing overheating, minimizing voltage drops, and complying with safety regulations, you can minimize the risk of electrical hazards and optimize the performance of your circuits.
When working with Romex and 20-amp circuits, it’s important to avoid common mistakes such as using undersized wires, neglecting voltage drop, making incorrect wiring connections, and lacking proper grounding.
By being aware of these pitfalls and taking the necessary precautions, you can avoid potential issues and ensure a reliable and safe electrical installation.
In cases where upgrading or replacing existing wiring is necessary, considerations such as circuit load, code compliance, and the age and condition of the Romex should be taken into account.
By evaluating these factors and following proper installation procedures, you can maintain a robust electrical system that meets current requirements.
By empowering yourself with the knowledge and understanding of Romex sizing for 20-amp circuits, you can tackle electrical projects confidently and ensure the safety and efficiency of your electrical system.
Remember to always consult local codes and regulations, and when in doubt, seek the assistance of a qualified electrician.
With the right approach, you can navigate the world of Romex and electrical wiring with ease, creating a reliable and secure electrical infrastructure for your home or building.
FAQS
What happens if I use an undersized Romex for a 20-amp circuit?
Using an undersized Romex can lead to overheating, insulation damage, electrical fires, and circuit failures. It is crucial to choose the correct wire gauge, typically 12-gauge, for safe and reliable operation.
Can I use a larger wire gauge than recommended for a 20-amp circuit?
Using a larger wire gauge, such as 10-gauge, can reduce voltage drop and provide additional capacity. However, ensure compatibility with other components and consult local electrical codes.
How do I determine the correct Romex size for a 20-amp circuit?
Consider factors like wire length, ambient temperature, and the expected load. Refer to the NEC ampacity tables or consult a qualified electrician for accurate guidance in selecting the appropriate Romex size.