If you’re considering a home renovation project, adding shiplap to your ceiling can be a great way to update your space and add some character. However, if you have a lath and plaster ceiling, you may be wondering whether it’s possible to install shiplap directly over it.
The short answer is yes, it is possible to install shiplap over a lath and plaster ceiling. However, there are some important things to consider before getting started.
In this blog post, we’ll go over the steps you need to take to ensure a successful installation, as well as some tips for achieving the best results.
So, whether you’re a seasoned DIYer or just starting out, read on to learn everything you need to know about installing shiplap over a lath and plaster ceiling.
What is Shiplap and Why is it a Popular Choice?

Shiplap is a type of wooden board that is characterized by its distinctive rabbet, or groove, along its edges.
This groove allows each board to fit snugly into the board above and below it, creating a tight, interlocking seal.
This not only makes shiplap easy to install, but it also creates a distinctive pattern that adds texture and visual interest to any space.
Shiplap has been used for centuries in both exterior and interior construction, but it has recently experienced a surge in popularity as a design trend.
Thanks in part to the popularity of farmhouse-style homes and rustic-chic decor, shiplap has become a go-to choice for homeowners looking to add a touch of warmth and charm to their spaces.
One reason for shiplap’s popularity is its versatility.
It can be used in a variety of ways, from covering entire walls and ceilings to creating focal points or accent pieces.
Its simple yet stylish design also allows it to work well with a wide range of decor styles, from traditional to modern.
In addition to its aesthetic appeal, shiplap is also a practical choice. Its interlocking design creates a durable, weather-resistant surface that can stand up to wear and tear.
It is also easy to clean and maintain, making it a great option for high-traffic areas.
Overall, shiplap’s popularity can be attributed to its combination of style and practicality.
Whether you’re looking to create a cozy, farmhouse-style bedroom or a sleek, modern living room, shiplap can be a great way to add texture and character to your space.
What to Consider Before Installing Shiplap over Lath and Plaster
Before installing shiplap over a lath and plaster ceiling, there are several important factors to consider. Here are some of the most important things to keep in mind:
Structural Integrity
It’s important to ensure that your lath and plaster ceiling is structurally sound and able to support the weight of the shiplap boards.
If you have any doubts about the strength of your ceiling, it’s best to consult with a professional before proceeding.
Moisture and Humidity
Lath and plaster ceilings are prone to cracking and warping in humid environments.
Before installing shiplap, make sure to address any moisture issues in your space and take steps to prevent future damage.
Surface Preparation
Before installing shiplap, you’ll need to prepare the surface of your lath and plaster ceiling.
This may involve removing any loose or damaged plaster, sanding the surface to create a smooth and even base, and applying a coat of primer to help the shiplap adhere properly.
Accessibility
Installing shiplap over a ceiling can be a challenging and time-consuming process, especially if you have limited access to the space above the ceiling.
Make sure to consider how you’ll be able to access the ceiling during the installation process and whether you’ll need any special tools or equipment.
Style and Design
Finally, it’s important to consider the style and design of your shiplap ceiling before getting started.
Think about the size and spacing of the boards, as well as the overall color and finish of the wood.
You may also want to consider incorporating other design elements, such as beams or molding, to enhance the visual appeal of your shiplap ceiling.
By taking these factors into account, you can ensure a successful and satisfying shiplap installation over your lath and plaster ceiling.
Materials and Tools You’ll Need
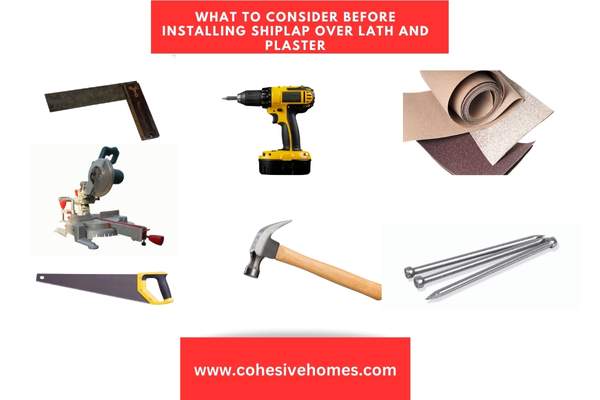
| Materials | Tools |
| Shiplap boards | Measuring tape |
| Adhesive (such as construction adhesive or Liquid Nails) | Level |
| Screws | Carpenter’s square |
| Finishing nails | Circular saw or miter saw |
| Wood filler | Jigsaw or handsaw (for cutting around fixtures or corners) |
| Sandpaper | Drill |
| Primer | Hammer |
| Paint or stain | Nail set |
Depending on the specific details of your project, you may also need additional tools such as a stud finder, drywall saw, or scaffolding.
When selecting your shiplap boards, make sure to choose high-quality, straight boards with minimal knots or defects. You may also want to consider the size and spacing of the boards, as well as the type of wood and finish.
Overall, having the right materials and tools is crucial to ensuring a successful shiplap installation over a lath and plaster ceiling.
Step-by-Step Guide to Installing Shiplap Over Lath and Plaster
Here is a step-by-step guide to installing shiplap over a lath and plaster ceiling:
- Measure the ceiling: Measure the length and width of the ceiling to determine how much shiplap you will need. Take note of any fixtures or obstacles that may require special cuts.
- Prep the ceiling: Remove any loose or damaged plaster and sand the surface to create a smooth, even base. Apply a coat of primer to help the shiplap adhere properly.
- Cut the shiplap: Use a circular saw or miter saw to cut the shiplap boards to the appropriate length. If you need to cut around fixtures or corners, use a jigsaw or handsaw.
- Apply adhesive: Apply construction adhesive or Liquid Nails to the back of each shiplap board, and press it firmly onto the ceiling. Use a level to ensure that each board is straight and even.
- Secure the shiplap: Once the adhesive has dried, use screws to secure each shiplap board to the ceiling. Sink the screws just below the surface of the wood, and fill the holes with wood filler.
- Finish the shiplap: Sand the shiplap boards to remove any rough spots or excess wood filler, and apply a coat of paint or stain to achieve the desired finish.
- Install trim: If desired, install trim or molding around the edges of the ceiling to create a finished look.
- Enjoy your new shiplap ceiling: Step back and admire your newly installed shiplap ceiling! With its warm, rustic look, it’s sure to be the focal point of your space.
By following these steps, you can successfully install shiplap over your lath and plaster ceiling and create a beautiful, unique look in your home.
Tips for Achieving the Best Results

Tips for achieving the best results” is an important aspect to consider when installing shiplap over a lath and plaster ceiling.
While this DIY project can be a fun and rewarding experience, there are certain techniques that can make the process go smoother and result in a more polished finished product.
From choosing the right materials to taking your time with measurements and cuts, there are several tips that can help you achieve the best possible results with your shiplap installation.
Key Tips and Tricks
- Choose high-quality shiplap boards: Make sure to choose shiplap boards that are straight, with minimal knots or defects. This will help ensure that your finished ceiling looks smooth and even.
- Use the right adhesive: Use a high-quality construction adhesive or Liquid Nails to adhere the shiplap boards to the ceiling. This will ensure that the boards stay in place and don’t shift or sag over time.
- Take your time with measurements and cuts: Measure twice, cut once. Take your time when measuring and cutting your shiplap boards, especially around obstacles or fixtures. This will help ensure that your boards fit properly and that the finished ceiling looks neat and professional.
- Pre-drill screw holes: To avoid splitting the shiplap boards, pre-drill pilot holes before driving screws into the wood.
- Sand and fill as needed: Sand any rough spots or excess wood filler between each step of the installation process. This will help ensure that your finished shiplap ceiling is smooth and even.
- Choose the right finish: Consider the overall look and feel of your space when choosing a paint or stain finish for your shiplap ceiling. A white or light-colored finish can help brighten up a room, while a darker stain can create a cozy, rustic look.
Common Mistakes to Avoid

While installing shiplap over a lath and plaster ceiling can be a fun and rewarding project, there are some common mistakes to avoid.
One of the most important is failing to properly prep the ceiling before installing the shiplap.
This includes removing any loose or damaged plaster, sanding the surface to create a smooth base, and applying primer to help the shiplap adhere properly.
Another common mistake is not measuring accurately, which can result in boards that don’t fit properly or an uneven finished product.
Additionally, using the wrong tools or neglecting to use adhesive can lead to damage to the boards or sagging over time.
Finally, rushing the process can result in mistakes and a finished product that doesn’t look as polished as it could.
By avoiding these mistakes and taking your time with each step of the process, you can ensure that your shiplap installation goes smoothly and that you end up with a finished product that looks great and adds value to your home.
Conclusion

In conclusion, installing shiplap over a lath and plaster ceiling can be a challenging but rewarding DIY project that can add a touch of character and warmth to your home.
Before you get started, it’s important to consider whether shiplap is the right choice for your specific situation.
Factors to consider include the condition of your existing ceiling, the look you’re hoping to achieve, and your level of DIY experience.
With the right tools, materials, and techniques, shiplap can be a beautiful and durable choice for your home.
By following the steps outlined in this guide, as well as the tips and tricks provided, you can ensure that your shiplap installation goes smoothly and that you end up with a finished product that you can be proud of for years to come.
FAQS
Can I install shiplap over a textured ceiling?
Yes, you can install shiplap over a textured ceiling, but you’ll need to sand down the texture and make sure the surface is smooth before installing the shiplap.
Do I need to remove the plaster from the ceiling before installing shiplap?
No, you don’t need to remove the plaster from the ceiling before installing shiplap. However, you should remove any loose or damaged plaster and make sure the surface is smooth and even.
What’s the best way to cut shiplap boards?
The best way to cut shiplap boards is with a circular saw or miter saw. Make sure to measure carefully and use a straight edge to guide your cuts.